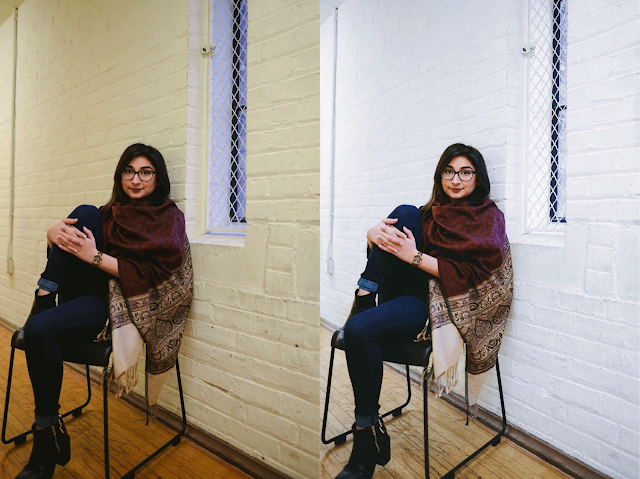
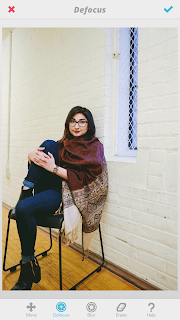
First, I start out with Facetune. I like to use this app for whitening up my pictures whenever there's a harsh yellow in them. Basically I tap on the Toothbrush Icon and drag my finger along the walls to brighten them up. The yellow almost immediately turns to white creating a much cleaner image. If I accidentally whitened up something I didn't mean to, I'll go in and use the Eraser Tool to undo my mistake. I also use this app to get rid of the "blemishes" on the wall by using the Patch Tool. There's a bunch of black smudges on the wall that makes it look dirty. I also adore the Details Tool (to give things more focus) and the Defocus Tool (blurring out unnecessary details). The cool thing about Facetune is that they have mini-tutorials for each of their features and tools, so it's super easy to learn how to use the app. In the end, I save the changes and upload it to my camera roll.


I then go into my Snapseed app and use the Selection Tool and Brush Tool a lot. I use the Selection Tool to make my selected area brighter, more colorful (saturation), or more vibrant (contrast). I then go in and use the Brush Tool to make things darker. I like to make my blacks and browns darker by using the Dodge & Burn option. I brush my finger along my screen on the parts I'd like to darken. Then, I export the picture as a copy onto my phone's camera roll.


Now, I open up the VSCO app. I've been using this app since I was in high school, and it's still my favorite for filters. I love how nicely the filters enhance my image rather than manipulating it or making it look like a cartoon. My favorite filters are A4, A5, A6, C1, HB1, HB2, P5, and occasionally a black and white one. Here, I add a filter to my image, usually never exceeding 50% of what it originally was. I also sharpen my image and add a pink tint to it (I might be in my 20s but pink still makes me happy). I also saturate the image a bit (to give me some color), raise the exposure, and lower the temperature (to take away yellow tones). Each image is different, but to this image, that is pretty much all I used this app for. After I'm done, I save the newly edited image to my camera roll in it's maximum size possible and then I'm ready to upload it to my social media outlets!


*If photos I'm using are taken by a professional photographer, all edits are theirs and they are given credit in the post(s).
Hope this helps you the next time you're editing your pictures! I love editing and do it on a daily basis, so these apps and techniques are not only some of my very favorite, but tested to the core. What are your favorite apps to edit with?
xo,
Aani
No comments